Needed Materials:
- Temporary Tattoo Paper – I bought mine on amazon.com. It was $13.99 for five 8.5″ x 11″ sets. There are several vendors that make similar products. Notice that it comes in either an inkjet or laser printer version, so be sure to buy the right one for your equipment.
- Scissors
- Damp Cloth
- Felt Tipped Markers
- Access to inkjet or laser printer
- Pencil, eraser and black fine-tipped pen if you are making your own drawings, or print one of the two templates I have provided above.
Instructions:
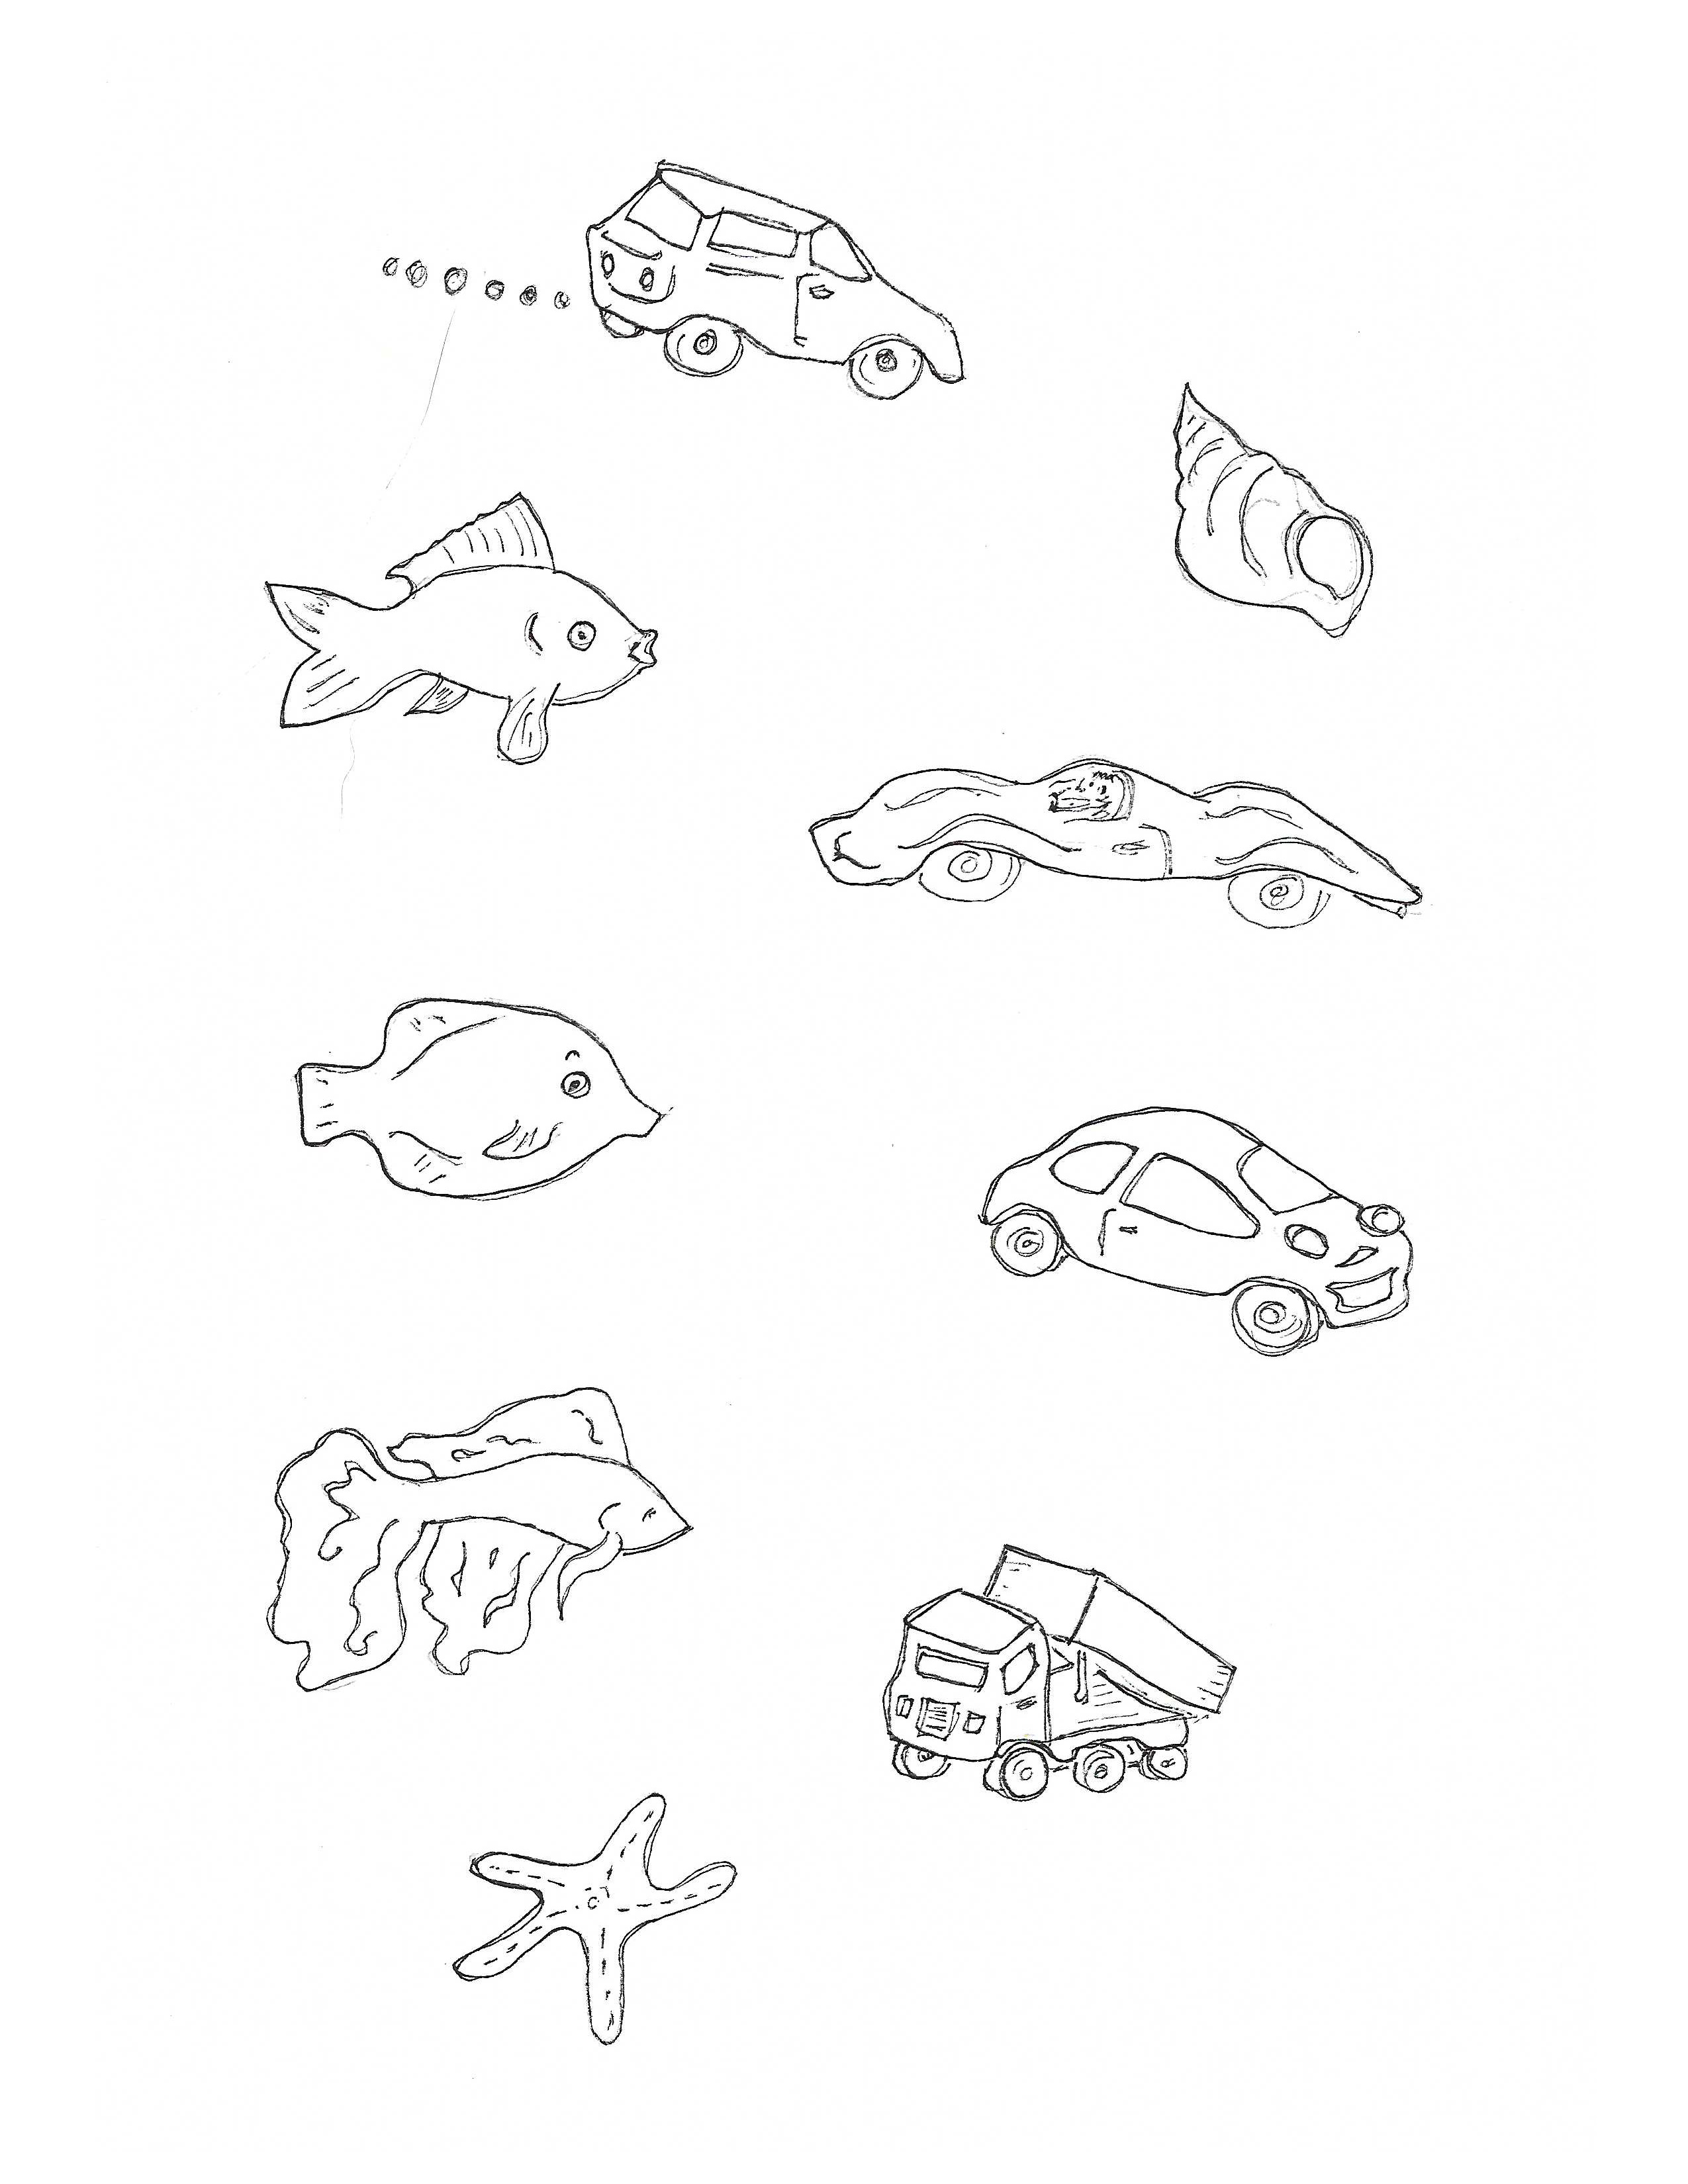
- If you or your child are making your own drawings, start out by doing that. It is easier to handle the whole sheet of tattoo paper at once rather than trying to do a few at a time, so go ahead and make enough drawings to fill an 8.5″ x 11″ sheet – not getting too close to the edges because those might not fully print. You’ll probably want each drawing to be no larger than 2″ x 3″ or so. They look best with sharp clean edges, so I drew in pencil first, then went over my lines with a black felt-tipped pen and erased all the pencil lines.
- I’m attaching two sheets of drawings you can use if you like. I originally drew just the first sheet and then a request came back from Finn for race-cars and fish : )
- Once you have your drawings the way you want them, you can go ahead and let your child color them now or do so after printing them on the special tattoo paper – I tested both ways and they worked equally well. However, DO keep a clean copy of your original uncolored drawings in case there are any mishaps.
- Time to print…
- The tattoo paper I bought uses two sheets – one sheet to print on and a second clear “sealer” sheet that goes on top of the printed tattoo sheet. The paper to print on has “TATTOO/INKJET PRINTING PAPER” on the back. The clear sealing sheet is blank. So…be sure you are using the tattoo paper sheet and not the sealer sheet and put it in your printer with the business side up or down, however your printer works.
- Once it prints, allow the ink to dry completely.
- Now it’s time for your child to color the tattoos, if they haven’t already. I tested water-based felt tip markers and permanent markers and for me the water-based worked better.
- After the tattoos are colored, it’s time to put on the clear sealer sheet. I’m not going to lie – this bit is fiddly. You carefully peel the sheet off its backing, position it over your sheet of colored drawings and lower it onto them. It’s like using clear contact paper. I find it easier to get the top edge positioned and then kind of ease the rest of the sheet down. There will probably be some air bubbles. You can smooth those out with your hand or the edge of a ruler.
- Cut the tattoos apart.
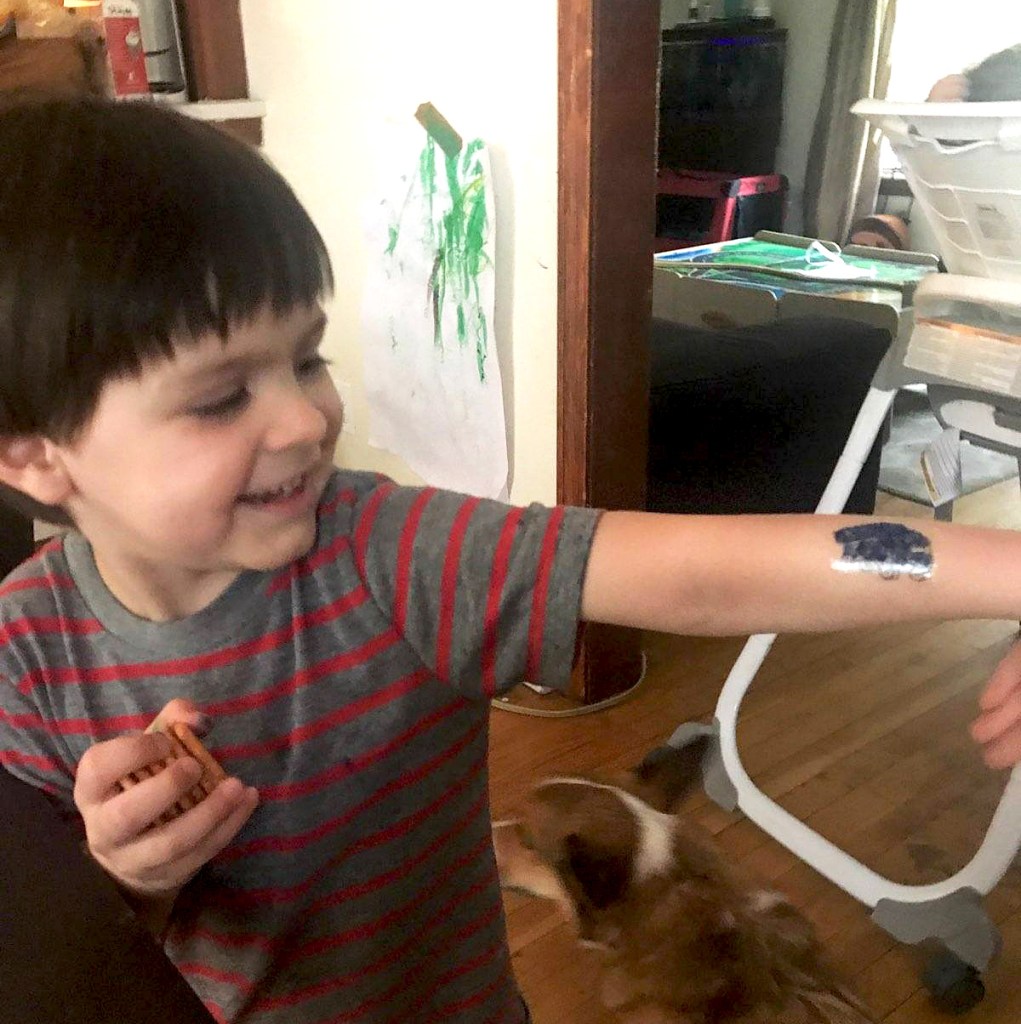
- To apply one, first peel off the clear plastic layer. Place the printed tattoo face down on the skin and press it down firmly, paying special attention to the edges. Then dab the back with a damp (not dripping) washcloth. The instructions say to use cotton, but a damp washcloth worked fine for us. After you dab a few times, the paper backing will look wet and start to slide off and you just take it off.
- That’s it – the instructions say the tattoos will last a week. Frankly the plastic “skin” felt a little bothersome to me and I peeled mine off after a few hours, so can’t really speak to longevity of them.
Extras:
We read My Dad Used to Be So Cool by Keith Negley (Flying Eye Books 2016). I chose this book because the illustrations of the Dad feature interesting tattoos. Actually, all the graphics are really snappy and the story-line is sweet. The New York Times had this to say about the book: Negley is carving out a niche exploring 21st-century masculinity issues for little dudes, in sincere and graphically sophisticated picture books that design-conscious parents will be happy to keep around the house.
Some weeks I am finding it difficult to find a song that’s related in any way to the subject matter of the project AND is also content appropriate enough for me to feel comfortable sharing. I’m noticing that some of the songs we thought were great when I was a child are not so great now, when you really pay attention to the words and listen to them from the perspective of a culture that has changed a great deal over the last 50 years or so. So, I am only going to include a song if I come across something that is just perfect for that week’s project.
Results:
Predictably, Finn loved this project and made tattoos not only for himself, but also for his mom and dad. My daughter told me that his coloring on the tattoos was the best he has done at staying inside the lines – something that is difficult for a 4-year-old. During the call, he told me he wants me to come to his house for 20 days. Those of you reading this now, in August of 2020, know we are still battered by the pandemic, and I can’t. I like to think of happier days ahead when grandmas can hop on a plane and go visit grandsons for 20 days, but in the meantime, these weekly Art With Grandma sessions are a big bright spot for this grandma’s heart.

